Phase Cancellation – The Easy Approach
Have you ever recorded or mixed multi-miked instruments, such as drums? Did you come up with this weird thin sounding result and you couldn’t quite pinpoint what you were doing wrong? No matter how you adjust the snare mic, it just sounds thin and hollow? Then you’ve probably faced phase cancellation.
In case you don’t know what’s going on, it can be very confusing. Everybody talks about phase and how it’s important to deal with it. You ask what it is, and they start jabbering about frequencies, sound waves and the science behind it.
That’s not what you want to hear! You want to know simply and shortly what it is, in which situation you’re likely to face phase cancellation, how does it affect your tracks and how to fix it. Am I right?
You’ve come to the right place, as this is the easy approach to phase cancellation, no bullshit and no technical jargon.
What Is Phase Cancellation?
Phase cancellation happens when you’re using more than one mic to record one source of sound. It can also happen when using a mic and a DI-box while recording a bass for example. It means that identical sound waves are coming to different mics in different times.
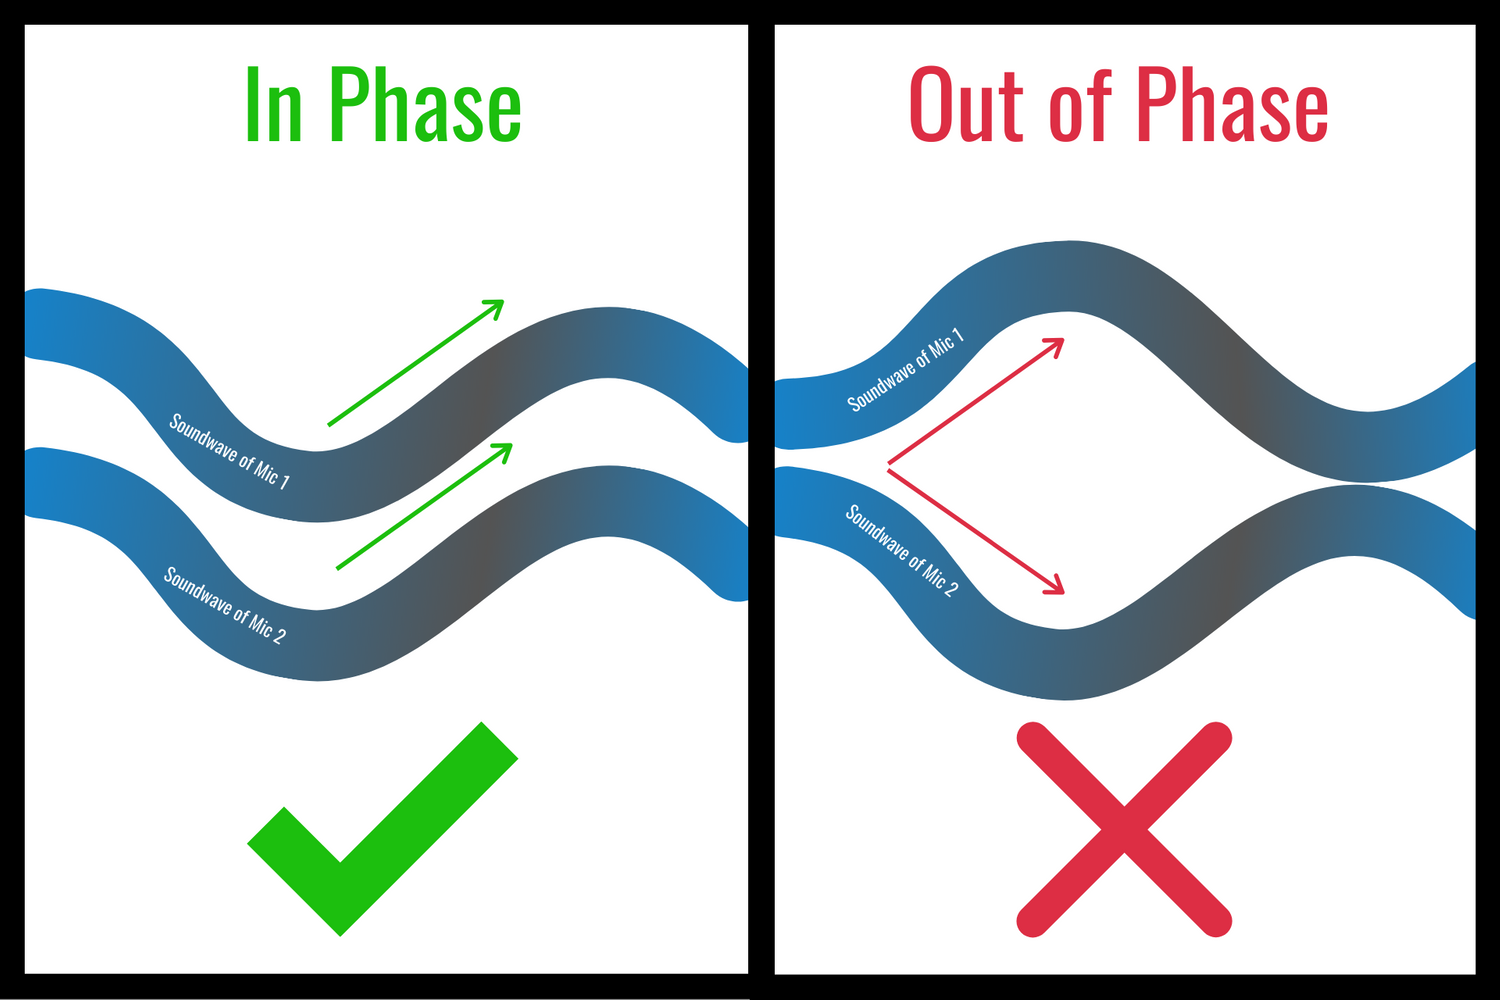
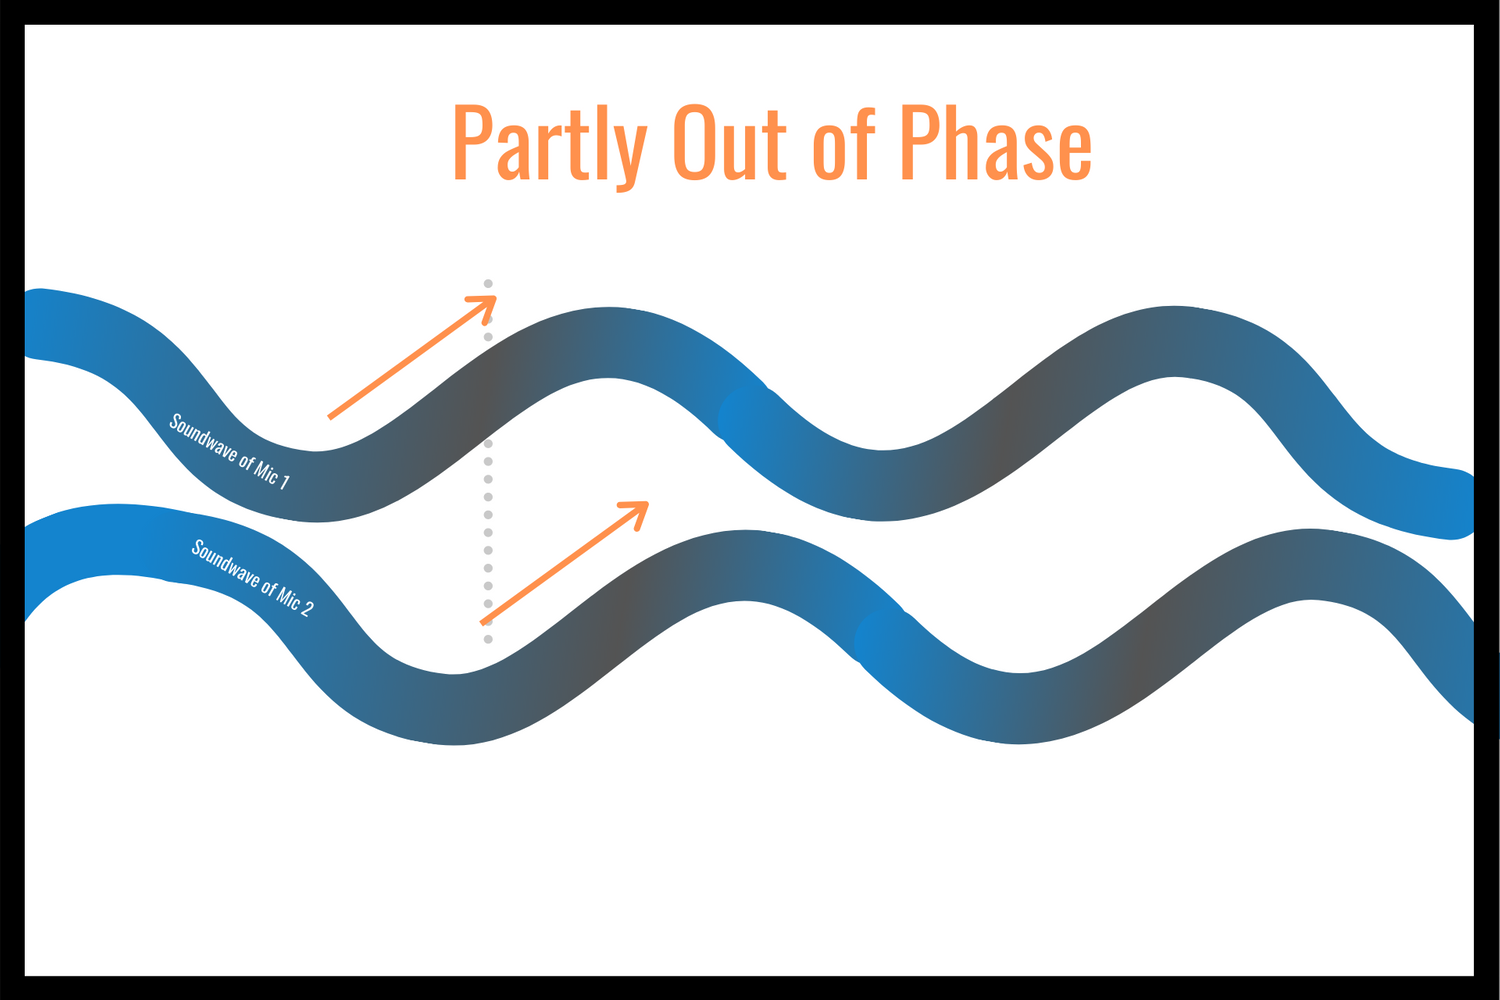
When sound waves are 180 degrees opposite to each other, they cancel themselves all together. One soundwave goes up, while another one goes down. However, they are rarely 180 degrees away from each other, but, for example 100 degrees apart. then they cancel themselves partly. The soundwaves are overlapping, one starts to go up while another one is still coming down.
How Does Phase Cancellation Affect on Your Tracks?
Phase cancellation makes your multi-miked instrument sound weak and powerless. Each of the mics sound good individually, but once listened together, something feels off. No matter how hard you boost EQ or squeeze with compression, it will sound bad.
Imagine that you’re recording a drum set and the snare just sounds thin and hollow. You’re adjusting the mic, but it won’t get any better. You boost it with EQ, but it doesn’t seem to help. On its own the snare sounds punchy and full, but when combined with the overheads and the rest of the drum mics, it’s like a fart in Sahara – no power or impact whatsoever.
How to Avoid Phase Cancellation?
The best way to avoid phase cancellation is to use as few mics as you can. On vocals, guitars, bass, strings, percussion and yes, sometimes on drums too, just one mic will do. When you record with one mic, there can’t be any phase issues. This way you don’t have to worry about them. Using one mic at a time on vocals, guitars and bass is a huge time and energy saver, you’ll save yourself from an endless hassle.
In case you can’t avoid phase cancellation altogether, such as when recording drums, try to at least minimize phase problems. When recording drums, you probably want to mic some of the individual drums with individual mics, but the overheads are harder to get right.
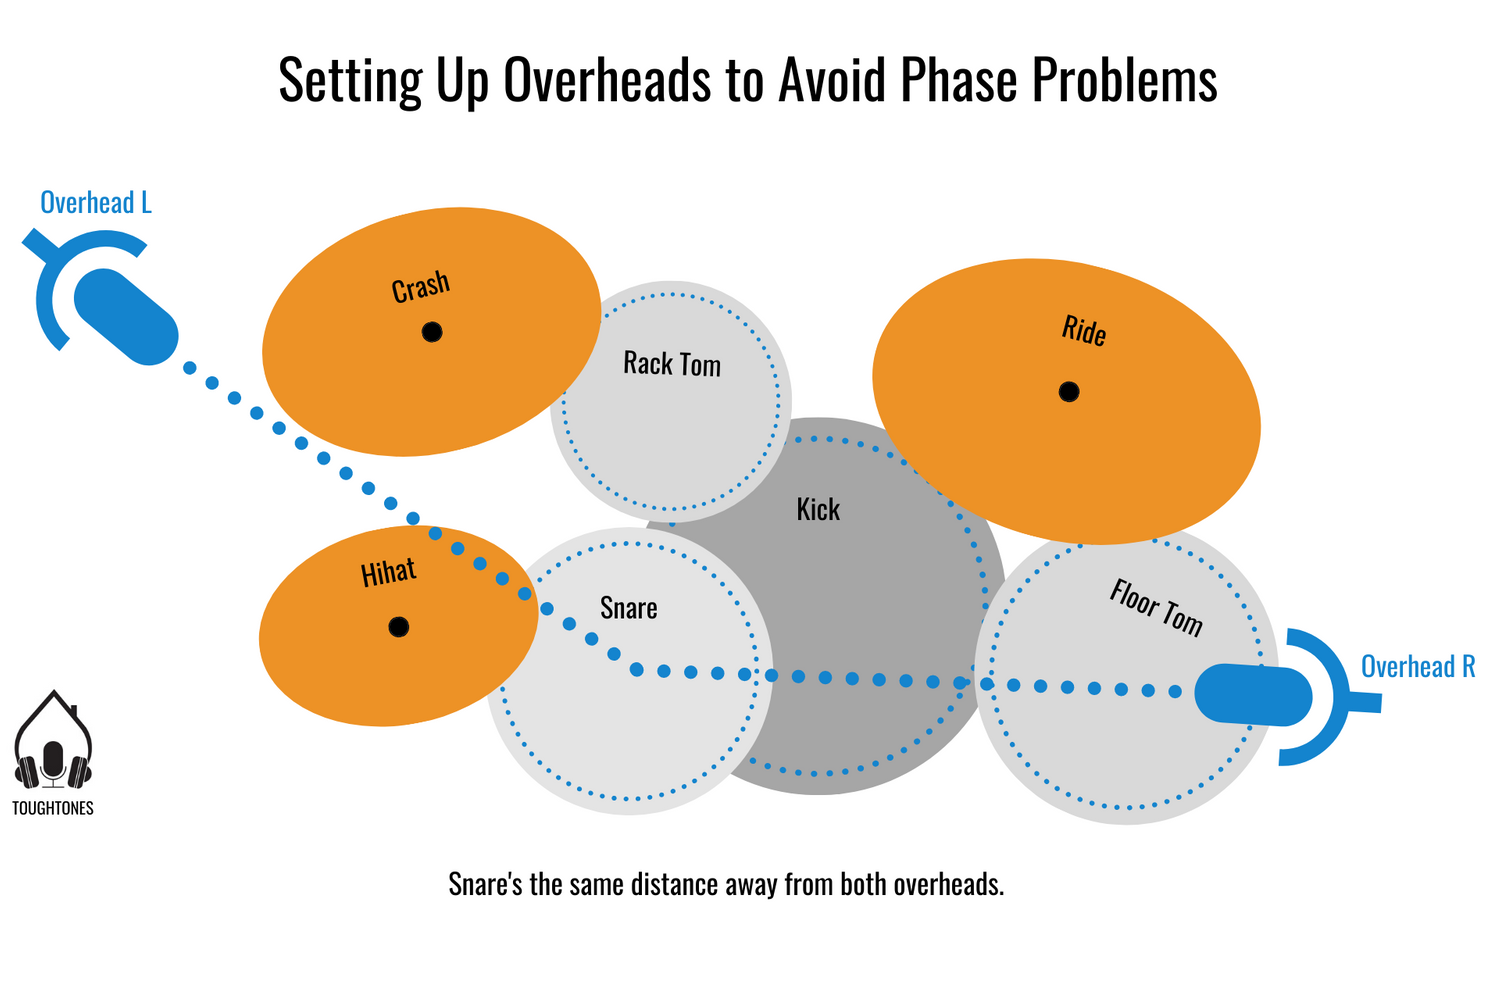
This is because you want the overhead mics to hear the snare and kick at the same time, so that they’re in the middle of the stereo picture – no more in the left than in the right. What this means, is that the sound of the snare and kick should reach both overhead mics at the same time, which means they have to be the same distance away from the snare and kick. Although the kick isn’t as much of a problem, because the snare is so much louder and closer to the overheads and a good amount of the low end is also cut from the overheads later on.
How to place the overheads so they’re in the right spot? Take a tape measure or a mic cable and measure the distance from the snare to both of the overhead mics. Make sure they’re equal distance away from the snare. This helps to get the snare to the center of the stereo picture and avoid phase problems.
How to Fix Phase Cancellation?
The solution is to flip the phase of one of the mics. You do this by using a plugin that has a phase switch built in it. For example in Logic Pro it is the Gain plugin and in Pro Tools it’s in the basic EQ. This will flip the phase of the sound wave 180 degrees.
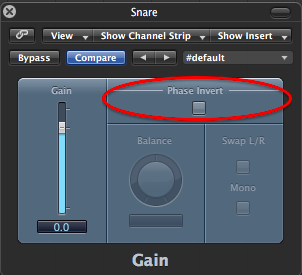
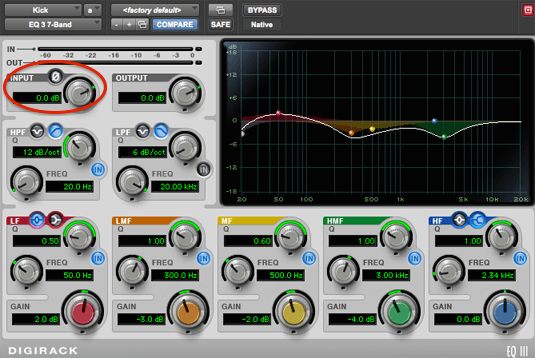
Let’s go back to the snare mic example. Flip the phase of the snare mic. This is how it sounds like before and after the phase is flipped around:
Before:
After:
Instant power, impact and fullness, and all we did was flip the phase. How awesome is that?
In case you have two snare mics, top and bottom, you might want to first check the bottom mic phase by flipping it. When you get the two snare mics in phase with each other, then route them to one “snare mastertrack” and check the whole snare track with overheads. Just flip the phase of the snare track and listen to whether it gets better or worse.
Like I said earlier, phase cancellation can be 180 degrees, or somewhere between 1 and 180 degrees. The multi-miked instrument doesn’t sound as bad, but still you feel it could be better. Sometimes flipping the phase doesn’t seem to do much. This is when you have to adjust the waveforms manually. Just move one of the tracks (snare) so that it matches phase wise better with the other track (overheads).
Summary
Phase cancellation can easily ruin your mix, but luckily it’s easy to fix once you know what’s going on. There’s no need to go further into scientific or theoretical aspects of it, because this is exactly how you deal with phasing problems. It’s not rocket science.
When recording, try to avoid multi-miking. If you do have to use them, try to minimize the phasing problems right at the source. When fixing phasing problems: start with flipping the phase of one mic and if it doesn’t help, try adjusting manually.
Thanks for reading. These PDF-guides will help you further with your music:
5 Steps to Create Music Faster (..and avoid the writer’s block!)
6 Step Guide to Realistic Midi Drums
You can get them for free today, no strings attached, enjoy!
